

This learning resource will support you in creating a 3D Model from a bunch of images.
Regard3D
Regard3D is an OpenSource photogrammetry software, that creates a 3D model from a bunch of images.
Webbased Demos of Results
Workflow for Photogrammetry
- Take a photo of object from multiple angles
- Watch the following videos to learn about photogrammetry with Regard3D
- How to Turn/Scan Objects Into 3D Models With Just a Camera Youtube Video by Alan's Art Lab (2016)
Remarks for taking images
- It is important to take 40 to 60 of photos/images and from multiple angles to create good quality of the 3D model. More images need more computation time but you will get a better quality of your 3D model.
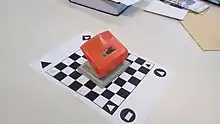
- place a structured surface under your object you want to scan. It helps Regard3D to identify spatial link between the set of images (see demo on the right with a chess board like surface the has unique markers on the edges to support identification of 3D geometry). The surface can be removed after the calculation of the 3D model within Regard3D.
- avoid direct sunlight and shades in your images
- provide all the images with same constant light (make some corrections e.g. in GIMP)
- avoid reflections on the objects (remove reflection with GIMP's Clone tool (Youtube)[2] if necessary)
Karlsburg Images and Models
- Karlsburg, Durlach - 360 Degree View with WikiCommons equirectangular Image
- 360-Degree Panorama with AFrame (see WikiCommons2Aframe - Starter Panorama)
| Source Object | 3D Model |
|---|---|
 Karlsburg Durlach - Germany |


3D Object for Images
Regard3D uses a set of images as a source to create a 3D object for it. The images will be recorded from different angles and different height. In this course you will learn to create a 3D model with Regard3D. Regard3Dis an OpenSource photogrammetry software, that creates a 3D model from a bunch of images.
Webbased Demos of Results
Workflow for Photogrammetry
- Take a photo of object from multiple angles
- Watch the following videos to learn about photogrammetry with Regard3D
- How to Turn/Scan Objects Into 3D Models With Just a Camera Youtube Video by Alan's Art Lab (2016)
Remarks for taking images
- (Number of Images) It is important to take 40 to 60 images and from multiple angles, to create good quality of the 3D model. More images need more computation time, but you will get a better quality of your 3D model.
- (Buildings) 3D models of higher buildings (like the Castle in Durlach, example) miss some 3D points in upper area of the building. Snapshots from different heights are not always possible (e.g. snapshots from the top of another building close by)
- (Drones) Drones can help to take images from different heights for different angles and distances from the scanned building.
- (Small Objects) For smaller objects place a structured surface under your object you want to scan (e.g. chess grid with unique markers at the edges). It helps Regard3D to identify spatial locations of points and the mathing between the set of images (see demo on the right with a chess board like surface the has unique markers on the edges to support identification of 3D geometry). The surface can be removed after the calculation of the 3D model within Regard3D.
- (Sunlight and Shades) avoid direct sunlight and shades in your images, because they might be detected as edges from a 3D objects and photogrammetry could create artefacts for the shades.
- (Constant Light) Illumination of an object located outside may differ due to changes in the cloud or adaptation of the image brightnes by the camera (if bright objects or the sun is visible in the camera image). It is recommended to provide all the images with same constant brightness or make some corrections with an image processing software (e.g. Open Source software GIMP)
- (Reflections) avoid reflections on the objects, because those reflections can be regarded as 3D points in the point cloud and these reflections could create artefacts in the generated 3D model. You can remove reflections with GIMP's Clone tool (Youtube)[2] if necessary)
For the 3D-point cloud the Castle Karlsburg in Karlruhe-Durlach, Germany was used and approx 14 images from different angle on the square were used with Regard3D. No drone was available to get images from a higher altitude.
Subsection
- Installation and Download of Software and Camera Sensor Data
- Download of Sample Sets of Images to start with and explore the features of the software.
Workflow with Screenshots
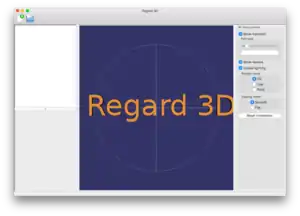
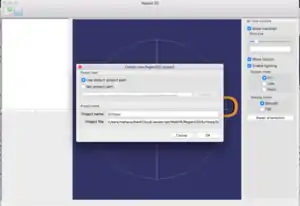
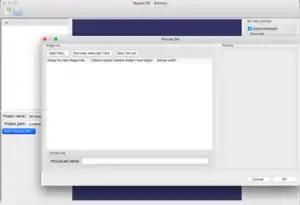
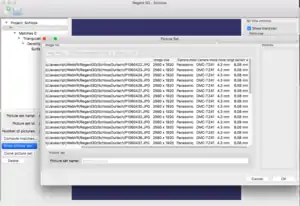
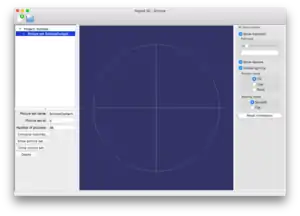
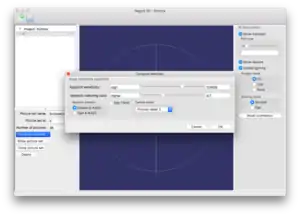
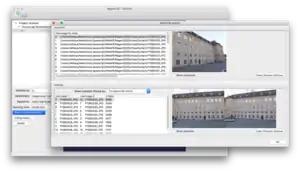
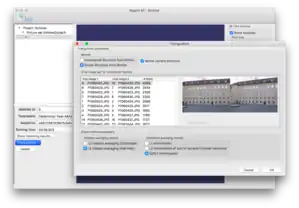
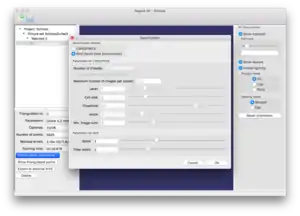
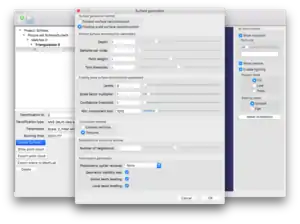
The images on the right show a workflow with Regard3D step by step.
- (1) Regard3D Start: Start Regard3D,
- (2) Regard3D-New Project: Create a new project in Regard3D,
- (3) Regard3D-Add Picture Set: add a set of picutres taken with you digital camera from different angles,
- (4) Regard3D-Check Camera Sensor Width: after adding the a set of picutres, check in the list by scrolling to the right, if the camera sensor width is available in the camera sensor database. Sensor Width is the last column in the image (so scroll to right)
- Image File Name
- Image Size
- Camera Maker
- Camera Model
- Focal Length
- Sensor Width (required info about camera is coming from the Camera Sensor Database)
- (5) Regard3D - Compute Matches: Compute Matches tries to identify a common points in different images in the loaded set of images. The reference points are the key info for reconstruction of the 3D model from the set of images.
- (6) Regard3D - Set Parameters for Key Point Matching: create a triangulation of dense point cloud including texture point cloud.
- (7) MeshLab; Cleanup the calculated 3D model with MeshLap.
Final Step: Cleaning the Point Cloud (MeshLab)
- Removing Artefacts in the point cloud,
- Noise Removal in the point cloud
- Optimize the mesh
- size reduction
- Texture optimization
The task mentioned above can be performed with OpenSource software MeshLab.
OpenSource Resources for Learning Resource
- http://www.regard3d.org
- http://www.meshlab.net
- https://www.opendronemap.org
- Regard3D Installers for Windows and MacOSX
- Regard3D on Linux with Wine. Wine allows to install and run Windows application on Linux. Because currently no Linux package is available, the WineHQ installation seems to be the easiest way to use Regard3D on Linux.
3D Models
3D Models can be added to a Photogrammetry Model (e.g. vehicles, plants, steam engine...)
Programming Task
The following learning task are for advanced learner, that want to improve the results of Regard3D. Nevertheless it is a good software design exercise to analyse at least to the beginning of 3D model improvement.
- Pattern recognition: Buildings consist of repeating symmetric elements. Explain a method,
- how you could fill missing 3D points/voxels by identification of similar geometric elements in the 3D model in a building,
- how to use symmetry assumption of a building and use them for correction of artefacts,
- due to the assumption that some parts of the surface have some geometric properties (lines, circle, square, rectangles, ...) interpolation
- Small Structure Injection: Assume we have a 3D model of a window that was scanned before with a higher resolution or was generated artificially (e.g. in Blender). Now we consider a Small Structure Injection (SSI) in a 3D model.
- compare roughly scanned objects/surfaces with existing 3D models that might be identified in the 3D model and create an index between 0 and 1 that tells you similar the scanned surface from Regard3D is in comparsion to the reference 3D models that represent smaller elements.
- define a threshold, when a smaller structure
- replace the recognize part in the Regard 3D model with the injected part of the already existing 3D model with high resolution - this improves the grade of detail for the scanned model artificially.
- The result looks better, but what are the consequences of this method? E.g. artefacts are more difficult to detect.
- Apply the Small Structure Injection to leaves and twigs of a tree. What are pattern recognition concepts, to detect tree from 3D shape, color, ...? Is SSI an acceptable method for trees or plants in general and what are the requirements and constraints of such use-cases?
Videos
- Regard3D - Tutorial (Duration 1h) - Youtube (2019) by Eduardo Cortez[3]
- Regard3D - Settings and Setup Comparisons - Youtube (2018) by Alan's Art Log[4] - How to mprove the quality of the 3D scan-
See also
References
- 1 2 Regard3D Homepage - (accessd 2017/11/18) - http://www.regard3d.org
- 1 2 GIMP Tutorial - Removing an Object from an Image - by Aubrey Watt (2013) - Youtube Video https://www.youtube.com/watch?v=mXV6KKfOBAk
- ↑ Eduardo Cortez (2019) Regard3D Tutorial - from Installation to 3D Object - URL: https://www.youtube.com/watch?v=QOjy6oPnLDA (assessed 2020/02/07)
- ↑ Alan's Art Log (2018) How to Scan Objects into 3D Models II - Settings and Setup Comparisons - URL: https://www.youtube.com/watch?v=7pGJ8rWiecw (assessed 2020/02/07)