< 3D Modelling < Create 3D Models 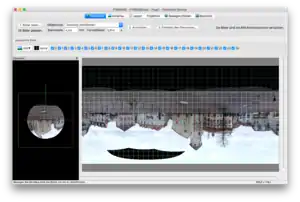

Hugin Software for 360 Degree Image in Aframe

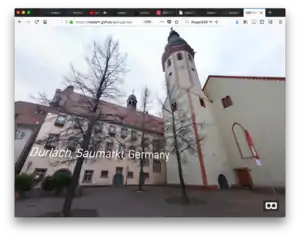
Hugin Result in Aframe - Link to interactive Aframe Website
Create an spherical image for 360o-Panorama Image. The underlying image must represent a special geometry of a spherical 360o-Panorama. The software Hugin will help you in creating such a panorama.
- (Final Hugin Result) See the final Hugin result based on the set [Hugin Sample Set of Images on Github] integrated in A-Frame
- (Panorama Image Stitching) Explore the collection of images in HuginSample GitHub repository with the Hugin Sample Images ZIP to learn about semiautomated creation of spherical projections of multiple camera images, stiched together by Hugin into a single Panorama image in AFrame.
- (Hugin Tutorial Video) Youtube Video by Brian Cluff about Hugin - 2017/02/07
Basic Workflow
Basic workflow with the wizzard.
- Set the export format to JPEG to Hugin/Settings/Stitching/Output Format (default is TIFF with compression LZA - good quality but very large files)
- Load Images in Hugin with Assistant/Wizzard.
- Selected Object Type: equirectangular (spherical)
- Save Project
- Align Images (press "Align"-Button in Assistant)
- Create Panorama (press "Create Panorama"-Button in Assistant)
- Panorama JPG is created in Image Folder - explore JSON3D4Aframe to use the spherical image in AFrame (see "AFrame Settings").
- Optional: Upload your 360-Degree panorama to WikiMedia Commons
Learning Tasks
- Create the equirectangular image with Hugin (see

- The image contains areas in the sky that are not covered by the images.
- Load the Hugin output in OpenSource software GIMP and use the

- Load the Hugin output in OpenSource software GIMP and use the
- Missing ground in the image. Append a white rectangle at the bottom so that the perspective distortion is corrected (see sample image from GitHub HuginSample).
- Fill the ground (inserted white rectangle at the bottom) with the

Create Sequence of Images with a Standard Camera

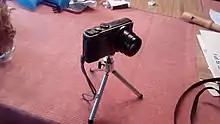
Indoor 360 degree images with small tripod

Larger tripod for outdoor use for taking images for a 360 degree image in AFrame
There are a few recommendations for taking the images (see Video of Image Shooting Techniques by Florian Knorn (2011) on Youtube[4].
- Image you are standing inside a sphere (centre) and you want cover the whole inner surface with snapshots.
- Use a camera with good image quality,
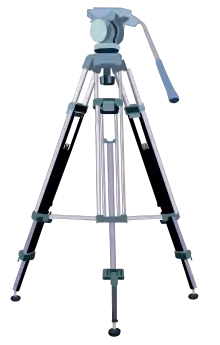
- Use a Tripod for taking the images,
- Use 25% percent overlap between images, so that Hugin can stich the images together.
- Use characteristical unique areas as overlap regions of the images, that allows automatic image stiching with Hugin without to much extra manual work of marking matching points between images.
- avoid repeating patterns in overlap area of images (e.g. similar windows of high rise building or a monotonous pavement as overlap region)
- Avoid moving objects in your images (if that happens you can mask those object in Hugin)
- Do not mix landscape and portrait format of the images.
- switch off automatic camera settings
- Filename Pattern: rename images to the following pattern by
- middle01.jpg, middle02.jpg, ... for images in a horizontal direction 360 degree.
- upper01.jpg, upper02.jpg, ... for images in a upper region above horizontal direction (e.g. part of sky, top floors of the building, ...)
- lower01.jpg, lower02.jpg, ... for images in a lower region above horizontal direction
- top.jpg vertical image into the sky
- button.jpg, ... vertical images (e.g. floor, remove tripod and take a snapshot from the ground)
When you cover the whole 360 degrees including sky and floor you can stich those images together with Hugin.
Final Result
- Final Hugin Result for the HuginSample Files on Github,
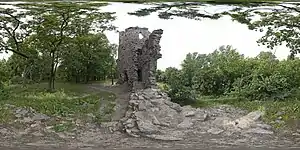
- Aldara Parks 360 Degree Image in Aframe with an already uploaded equirectangular image in WikiMedia Commons by U.Bardins
External Resources
- HuginSample Github repository with sample images of the Durlacher Saumarkt, Karlsruhe Durlach, Germany
- Hugin Download: http://hugin.sourceforge.net/
- Link to interactive Aframe Website of Durlach Saumarkt - Look around on the square by dragging the image with the mouse.
- 3D Tour with AFrame (by Viktor Aigenseer 2018 on Github)
See also
- Image Maps as more simple options to create a visual representation of Learning Resources in Wikiversity
References
- ↑ Hugin Video Tutorial by Brian Cluff (2017) - (accessed 2018/01/04) - https://www.youtube.com/watch?v=O_gONzUndQo
- ↑ GIMP Clone Tool Video Tutorial by John Philip Jones (2014) - (accessed 2018/01/04) - https://www.youtube.com/watch?v=snkGHfrPGiA
- ↑ GIMP Clone Tool Documentation (accessed 2018/01/04) - https://docs.gimp.org/2.2/en/gimp-tool-clone.html
- ↑ 360x180° Panorama Tutorial - Pt.1: Shooting the images (2011) by Florian Knorn - https://www.youtube.com/watch?v=mUiw3jtErxk&list=PL15B8C737F69319BE&index=2
This article is issued from Wikiversity. The text is licensed under Creative Commons - Attribution - Sharealike. Additional terms may apply for the media files.
