| Pursuit to Haritan | |||||||
|---|---|---|---|---|---|---|---|
| Part of the Middle Eastern theatre of World War I | |||||||
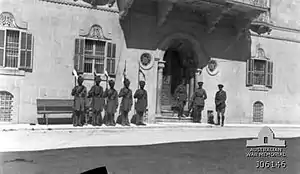 Desert Mounted Corps headquarters at Aleppo | |||||||
| |||||||
| Belligerents | |||||||
|
|
| ||||||
| Commanders and leaders | |||||||
|
|
| ||||||
| Units involved | |||||||
|
XXI Corps Desert Mounted Corps |
Remnants of the Fourth Army Seventh Army Eighth Army Asia Corps | ||||||
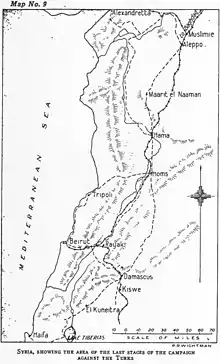
The Pursuit to Haritan occurred between 29 September and 26 October 1918 when the XXI Corps and Desert Mounted Corps of the Egyptian Expeditionary Force (EEF) pursued the retreating remnants of the Yildirim Army Group advanced north from Damascus after that city was captured on 1 October during the final weeks of the Sinai and Palestine Campaign of the First World War. The infantry and corps cavalry advanced from Haifa and Acre to capture the Mediterranean ports at Beirut and Tripoli between 29 September and 9 October. These captures enabled the inland pursuit to be supplied when the Desert Mounted Corps' 5th Cavalry Division resumed the pursuit on 5 October. The cavalry division occupied one after the other, Rayak, Homs, Hama. Meanwhile, Prince Feisal's Sherifial Force which advanced on the cavalry division's right flank, attacked and captured Aleppo during the night of 25/26 October after an unsuccessful daytime attack. The next day the 15th (Imperial Service) Cavalry Brigade charged a retreating column and attacked a rearguard during the Charge at Haritan near Haritan which was at first reinforced but subsequently withdrew further north.
Following the victory at the Battle of Megiddo on 25 September the Yildirim Army Group was forced to withdraw towards Damascus. The commander of the Egyptian Expeditionary Force General Edmund Allenby ordered Lieutenant General Henry Chauvel's Desert Mounted Corps to pursue these retreating columns. Followed by the 5th Cavalry Division, the Australian Mounted Division pursuit took them via Kuneitra and the 4th Cavalry Division pursuit took them inland to the Hejaz railway where they joined forces with Prince Feisal's Sherifial Force after their captured Deraa. Several rearguards were attacked and captured at Irbid by the 4th Cavalry Division Jisr Benat Yakub, Kuneitra, Sa'sa', Kaukab, the Barda Gorge by the Australian Mounted Division and Kiswe by the 5th Cavalry Division. After Damascus was captured the remnant Yildirim Army Group were pursued along the road to Homs and attacked by light horsemen at the Charge at Khan Ayash.
While the Yildirim Army Group was retreating back their lines of communication were shortened facilitating supply while Desert Mounted Corps was getting further away from their base and their lines of communication had to be extended. The pursuit north from Damascus began with the advance along the Mediterranean coast by the XXI Corps north from Haifa and Acre to capture the ports at Beirut and Tripoli through which supplies could be transported to support Desert Mounted Corps advance. While the Australian Mounted Division continued to garrison Damascus the 4th and 5th Cavalry Divisions continued the pursuit towards Rayak and Baalbek as the advance along the coast was progressing. From Baalbek the 4th Cavalry Division could not continue due to sickness and remained to garrison the area while the 5th Cavalry Division, was reorganised into two columns and reinforced by a number of armoured cars continued the pursuit with Prince Feisal's Sherifial Force covering their right flank to Homs and Hama. By 22 October the armoured cars were 30 miles (48 km) south of Aleppo with the 15th Imperial Service Cavalry Brigade catching up on 25 October just before Sherifial forces captured Aleppo. Early in the morning of 26 October the 15th Imperial Service Cavalry Brigade continued the pursuit to Haritan where they charged Ottoman rearguards which proved too strong. By that evening, the 14th Cavalry Brigade had arrived and the strong Ottoman rearguard withdrew as a result. On 27 October the Australian Mounted Division was ordered to advance to Aleppo. They had reached Homs, when the Armistice of Mudros was announced, ending the war in the Sinai and Palestine theatre of the First World War.
Background
In southern Lebanon lived four varieties of Christians; the Maronite, Greek Uniats, Greek and Syrian Orthodox (Jacobite) lived alongside many Protestants, Druzes and Metawala. In the Southern Bukaa Valley and on the western slope of Mount Hermon, were more Druses, while in the Bukaa, Metawala and Syrian Orthodox Christians lived. In the Northern Lebanon, besides the same sects of Christians as in the south, more Metawala and an exclusive sect of Shiahs, the Ismailiyah lived. North of Damascus many Syrian Christians lived, and to both the north and the south some Metawala.[1] Villages north to the Lake of Homs were Christian and Arab, while the city was mainly Moslem with a Christian minority of mainly Greek Orthodox. To the east of all these peoples, were the nomadic Bedouin Arabs of the Beni Khalid and Nueim tribes, who according to a British Army report came "from the steppe hills and desert east of Homs and Anti-Lebanon", to spend the summer in Bukaa.[2]
Following the comprehensive success of the Battle of Megiddo, Sir Henry Wilson, Chief of the Imperial General Staff (CIGS) at the War Office encouraged Allenby with the idea that the EEF could do anything: "There is much talk here of the usual kind some saying you could go to Petrograd and some saying that all your force should now be transported to France, and some again who would like to see you march east to Baghdad!"[3] He continued: "Your success being so complete, I should like you to consider the possibility of a cavalry raid on Aleppo, to be supported by infantry or not as the situation developed and as opportunities offered." He added that the War Cabinet was prepared to take full responsibility for any unsuccessful outcomes.[4]
The War Cabinet, recognising the vast influence which the victory in Palestine would have on the whole war, were urging that our great success should be exploited to the fullest extent, and wished for an immediate advance on Aleppo, some three hundred miles to the north.
— W. T. Massey, British War Correspondent[5]
The War Office desired a quick cavalry raid on Aleppo 200 miles (320 km) away. Allenby's EEF at Damascus was already 150 miles (240 km) away from its main supply base and he was prepared to advance only in stages as supply and geography dictated.[6] However, the difficult problem of supplying even a small force as far north as Aleppo 350 miles (560 km) from base would need to be solved.[7] Before either Damascus or Beirut had been captured, Allenby explained to Wilson that a raid on Aleppo "did not seem feasible unless supported by large-scale military and naval operations at Alexandretta."[8]
I could not hope, even if the opposition was negligible, to reach Aleppo, which is distant 300 miles from Nazareth, with three cavalry divisions in less than three weeks. A march of this description would furthermore entail very heavy wastage, and the cavalry would arrive in no condition to deal with the troops in the Aleppo–Alexandretta area. These latter now amount to 25,000 combatants, and during the next three weeks they will be augmented by reinforcements of a good quality, which are already setting out from Anatolia. In each succeeding week the Turkish situation will be ameliorated by the arrival of further reinforcements, which are believed to have started from Constantinople and the Caucasus.
— Allenby to Wilson 25 September 1918[9]
Prelude
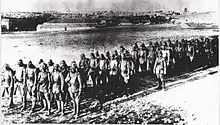
Yildirim Army Group concentrate at Rayak
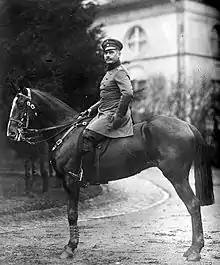
Liman von Sanders had seen the Eighth Army destroyed and its headquarters dissolved and the loss of most of the Yildirim Army Group's artillery.[10]
The surviving 300 German and Ottoman soldiers who had formed the Haifa garrison arrived at Beirut on 26 September and were ordered to continue on to Rayak.[11]
Liman ordered von Oppen's Asia Corps (formerly part of the Eighth Army) to withdraw by train from Deraa at 05:30 on 27 September; he was delayed nine hours by a break in the line 500 yards (460 m) long 30 miles (48 km) north of Deraa, to arrive at Damascus the following morning; travelling straight on to Rayak where he was to establish a defensive line.[12]
Liman von Sanders transferred his headquarters to Baalbek on 29 September and Mustapha Kemal Pasha, commander of the Seventh Army, arrived at Kiswe with his army's leading troops. He was also ordered to Rayak to take over command of that sector, Jemal Pasha, commander of the Fourth Army also took command of the Tiberias Group defending Damascus while Jevad Pasha and the Eighth Army staff had been sent back to Constantinople. The 146th Regiment was the last formation to leave Damascus on 30 September. After hearing the Barada Gorge was closed von Hammerstein left Damascus by the Homs road, following the III Corps, the 24th Division and the 3rd Cavalry Division to Rayak where even remnants of the 43rd Division of the Second Army which had not been involved in fighting, were "infected with panic."[12]
About 19,000 Ottoman soldiers had retreated northwards by 1 October, no more than 4,000 of whom were equipped and able to fight. "Successive defeats in adverse conditions meant that their morale and physical condition were generally poor, they had no artillery support and transport was virtually non–existent ... they were unlikely to be able to offer much solid resistance to a determined British cavalry force operating north of Damascus."[13]
Only von Oppen's force which had travelled by train to Rayak before the Barda Gorge was closed and the 146th Regiment marching to Homs remained "disciplined formations" by 2 October.[11]
EEF advance from Haifa
Allenby's plan outlined to Henry Wilson, CIGS at the War Office on 25 September, included an advance to Beirut at the same time as the advance to Damascus:
I hope to begin within a few days, an infantry division marching up the coast from Haifa to Beirut, while the Desert Mounted Corps ... moves on Damascus. The infantry division I propose to feed, as the advance proceeds, by putting supplies from the sea into Acre, Tyre and Sidon, and finally Beirut.
— Allenby to Wilson 25 September 1918[9]
However, the 7th (Meerut) Division (XXI Corps) with the 102nd Brigade Royal Garrison Artillery and did not arrive at Haifa until 29 September while the XXI Corps Cavalry Regiment which was attached, was at Acre. They were unable to leave until 3 October when the 54th (East Anglian) Division took over garrison duties in the Haifa area.[14]
The 7th (Meerut) Division began their march to Beirut in three columns. The leading column consisted of the Corps Cavalry Regiment, one company of infantry and the 2nd Light Armoured motor Battery.[15][16][17] The second column consisted of the 3rd and 4th Companies Sappers and Miners, the 121st Pioneers with the 53rd Sikhs and 2nd Battalion Leicestershire Regiment (28th Brigade).[18] The remainder of the 28th Brigade with the 19th and 28th Brigades of infantry, the 261st, 262nd and 264th Brigades of Royal Field Artillery (RFA) and the 522nd Field Coy, RE completed the 7th (Meerut) Division.[19]
The poorly maintained road along the coast was in places only 6 feet (1.8 m) wide with a one in five gradient as it passed over the Ladder of Tyre.[15][17] The second column began work to improve this narrow track cut over the cliff face. It took three days to blast the rock and build a surface suitable for wheeled transport.[16][17]
Meanwhile, the XXI Corps Cavalry Regiment comprising one squadron Duke of Lancashire Yeomanry and two squadrons of 1/1st Hertfordshire Yeomanry were able to advance without waiting for the road works to be completed. They moved quickly along the road to arrive in Tyre also known as Es Sur on 4 October.[16][20]
During the advance to Tyre they encountered "few if any Turkish troops."[21] Three days supplies were delivered by sea to Tyre, for the three columns to pick up on their way north. By 6 October the leading column had entered Sidon also known as Saida, where more supplies arrived, again by ship.[20]
Occupation of Beirut

Beirut, a largely Christian city with a population of 190,000 before the war, was strategically important due to its "great port", located 7 miles (11 km) south of Nahr el Kelb (or Dog River).[20][Note 1] The Ottoman 43rd Division which had arrived early in October had been assigned the defence of Beirut.[10]
The first British Empire forces to arrive at Beirut were an armoured car reconnaissance from Rayak or Zahle by the 5th Cavalry Division on 7 October. They found Ottoman forces had already evacuated the city and an Arab government under Shukri Pasha Ayubi had been installed. A French destroyer and five French vessels were also in Beirut harbour.[22][23]
The XXI Corps Cavalry Regiment with attached infantry company and the 2nd Light Armoured Motor Battery arrived at Beirut on 8 October. The city was occupied without opposition when 600 prisoners were captured.[16][20] The remainder of the infantry division and artillery followed when the road enabled the movement of wheeled vehicles.[16] Private Norman F. Rothon, a mule driver with the 13th Mountain Howitzer Battery, 8th Brigade RGA, 7th (Meerut) Division, arrived at Beirut on the evening of 9 October. He and his unit had marched 226 miles (364 km) since 19 September; 40 miles (64 km) of that total were marched between 8 and 9 October. Rothon wrote in his diary, "if I was asked how I felt when we arrived I should say like a cripple and fairly doubled up and I hope I shall never experience another march like it the men tramping along with hollow cheeks and staring eyes, nothing to eat but the awful Bouilli & Biscuits and lots of the men go without as their stomachs cannot stand the awful repetition (we have had 3 weeks of it). My inside yearns for some ordinary food & vegetables."[24]
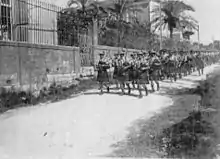
Lieutenant General E. S. Bulfin, commander of the XXI Corps, established his headquarters in the city's main hotel, to oversea devolution of the city's administration to the French following the terms of the Sykes–Picot Agreement. He appointed Colonel de Piépape, commander of the infantry Détachment Français de Palestine et de Syrie, military governor at Beirut. He also appointed French military governors to Sidon and Tyre. When detachments of French troops arrived from Haifa by sea to garrison the three towns, they found some unrest caused by disappointed Arab Sherifial representatives.[16][25] The infantry Détachment Français de Palestine et de Syrie arrived at Beirut on 20 October, and the cavalry Regiment Mixte de Marche de Palestine et Syrie, detached from the 5th Light Horse Brigade, arrived on 24 October. The 54th (East Anglian) Division arrived at Beirut on 31 October 1918.[26]
On 11 October Allenby reported to the War Office:
Shukri el Ayubi has not yet been withdrawn from Beirout by Feisal. He has however modified his attitude so far as to instruct the heads of the Police and the President of the Municipality that they must accept my Corps Commander at Beirout's Orders.
The town is quiet, and the Arab flags flying here have been lowered.
The policy I am adopting is as follows : –
I am recognising Arab independence in Areas 'A' and 'B'; advice and assistance in these areas being given by French and British respectively.
French interests are recognised as being predominant in the 'Blue' area.
Feisal is being warned that if he attempts to control the 'Blue' area, the settlement of which must await the Peace Conference, he will prejudice his case. He is also being told that the Lebanon's status is a peculiar one, and was guaranteed by the Powers, so that he will [be] treading on delicate ground if he attempts undue interference in that area
— Allenby report to Wilson 11 October 1918 [27]
Chauvel recalled in 1929:
Bulfin, on arrival on the 8th made Shukri remove his flags and himself from the Serai and put in Col. Piepape as Military Governor of the Lebanon. I had no difficulty in explaining my share of it to General Bulfin but, up to the time I left the Country, I never succeeded in persuading Col. Piepape that I was not backing Feisal in his attempt to annex Lebanon.
— Copy of Record dated 22 October 1929 written by Lt. Gen. Sir H. G. Chauvel regarding the meeting between Sir Edmund Allenby and the Emir Feisal at the Hotel Victoria, Damascus, 3 October 1918 and subsequent events[28]
Occupation of Tripoli
On 9 October Allenby issued orders for the speedy occupation of Tripoli by the 7th (Meerut) Division.[29] The town and the port of El Mina were strategically important because supplies could be unloading at the port and quickly transported inland to Homs on the main road to Aleppo. The capture of Tripoli would vastly improve the lines of communication supporting the pursuit.[26][30]
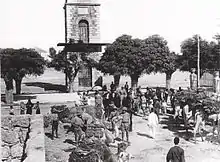
Tripoli was occupied unopposed on 13 October by the 7th (Meerut) Division led once again by the XXI Corps Cavalry Regiment and the 2nd Light Armoured Motor Battery following Bulfin's orders for the continuation of the coastal advance northwards.[26][30] The leading column was followed by the 19th Infantry Brigade Group commanded by Brigadier General W. S. Leslie which arrived on 18 October. The remainder of the 7th (Meerut) Division arrived not long after.[26] Rothon arrived in Tripoli on 18 October, after a 15 miles (24 km) march over mountain passes and sand. "Felt absolutely done up when we got here and at times felt like lying down and giving in as I feel as if my very life blood is being drawn from me in these long marches, in addition to which we are only at half strength which means double work for us all." He was hospitalised in Tripoli shortly after and was still there at the end of the month.[31]
The 5th Cavalry Division was ordered on 9 October to advance to Homs, where they could be supplied overland, along the fairly good road from Tripoli, as a direct result of that town, with its small port of jetties "suitable for landing stores in fine weather", being occupied.[32][33] On 22 October a casualty clearing station was landed at Tripoli to evacuate 5th Cavalry Division sick and wounded.[34]
Pursuit from Damascus
Yildirim Army Group withdraw from Rayak
After an RAF attack on Rayak, Liman von Sanders withdrew the Rayak force on 2 October sending most of his troops including Colonel von Oppen's Asia Corps under the command of Mustapha Kemal to Aleppo, to prepare a defence.[35] This force retreated to Homs via Ba'albek on their way to Aleppo; the first place offering the possibility of a strong defence, while the remnant Fourth Army prepared a rearguard defence of Homs.[29]
The Seventh Army's III Corps' 1st and 11th Divisions and XX Corps and the 48th Infantry Division, were still intact and conducting a fighting retreat by 6 October.[10] The 1st and 11th Divisions had been reorganised into the new XX Corps, which included one complete Turkish regiment.[36]
4th and 5th Cavalry Divisions' pursuit
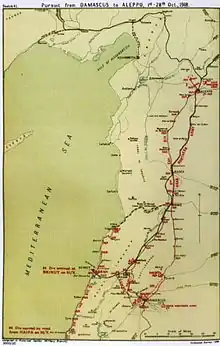
The country north from Damascus, with its grand mountains and fertile valley and slopes, was described as being more beautiful than that to the south of the city. The Nahr el Litani or Leontes river flowing south between the parallel ranges of the Lebanon and the Anti-Lebanon enters the sea between Tyre and Sidon. Along the valley cattle, sheep and goats grazed and barley and wheat were grown with oats in the north. The only breaks in the north-south Lebanon and Anti-Lebanon mountain ranges occur from Damascus to Beirut and from Homs to Tripoli.[37]
On 5 October the advance north was resumed although supply would be difficult.[38] Allenby anticipated capturing the ports of Beirut and Tripoli, which would improve supplying rations to Desert Mounted Corps. "Nevertheless his decision [to continue the pursuit] was born of rare ambition and resolution."[39] It would be a "bold move" as the British Empire troops would be well beyond range of support from the rest of the EEF.[40]
Allenby briefed Chauvel on his Aleppo campaign plans at Chauvel's new headquarters in a former Yilderim Army Group building in the south–western suburbs during his day-trip to Damascus on 3 October. The Australian Mounted Division commanded by H. W. Hodgson was to garrison Damascus, while the 5th Cavalry Division commanded by Major General Henry Macandrew and the 4th Cavalry Division commanded by Major General G. de S. Barrow advanced to Rayak 30 miles (48 km) northwest of Damascus, to establish a new forward line to stretch east to Beirut.[21][41][Note 2]
.jpg.webp)
The 4th and 5th Cavalry Divisions left Damascus together on 5 October without wheeled transport and guns which rejoined at Khan Maysalun 15–18 miles (24–29 km) from Damascus and 3,500 feet (1,100 m) above sea-level after passing through the city. The Sherwood Rangers regiment which had been on the lines of communication at Kuneitra rejoined the 14th Cavalry Brigade, 5th Cavalry Division. The 12th Light Armoured Motor Battery and the 7th Light Car Patrol also joined the divisions.[32][42][43]
From Khan Meizelun the 4th Cavalry Division moved to Zebdani on the railway between Damascus and Rayak while the 5th Cavalry Division moved towards Rayak by the main road through Shtora.[32] On the march towards Shtora, "A violent storm, lasting several hours, burst as soon as bivouac was reached and lasted the greater part of the night. This did not improve matters as regards the malaria outbreak, which was by then almost at its height."[43]
Occupation of Rayak
They advanced next day to Rayak; towards the railway junction of the main railway from Constantinople with the railways from Beirut and Damascus which branched at Rayak 30 miles (48 km) away. Rayak was reported to be occupied by about 1,000 Ottoman and German soldiers.[22][44] During the night of 5/6 October, a report was received that the Ottomans had withdrawn from Rayak.[21]
The 5th Cavalry Division and 14th Brigade arrived in Rayak on 6 October to find considerable destruction caused by an RAF air-raid on 2 October and captured some prisoners, railway rolling stock and military equipment.[45][32][46] Here the remains of 32 German aircraft were found, "including some of the latest type, [which] had been either abandoned or burnt by the enemy."[47] Military equipment, engineers' stores, several locomotives and rail trucks were captured at Rayak. The 14th Cavalry brigade also captured 177 prisoners and some guns when they occupied Zahle a few miles north of Rayak, also without opposition.[22][32][45][46]
Beirut reconnaissance
On 7 October armoured cars attached to the 5th Cavalry Division made a reconnaissance to Beirut, without opposition being encountered. They arrived about noon to find Ottoman forces had withdrawn from the city.[32][46]
Occupation of Baalbek
On 9 October Allenby ordered the continuation of their advance to Homs following the railway.[33]
Though they [the Lebanon mountains] rise gently, they leave the Plain abruptly – so flat is it. A few tiny mounds rise in the heart of the Plain just as abruptly. The colour of vine splashes the rich red soil of the hill side. The road up to Baalbek is strewn with wine–growing villages.
— Lieutenant Dinning's description of the road from Damascus to Baalbek on 31 October 1918[48]
Baalbek was occupied unopposed on 10 October by a light armoured car reconnaissance.[29][32]
Baalbek, the first stage of its advance to Homs has been reached by the leading brigade of the 5th Cavalry Division.
— Allenby report to Wilson 11 October 1918[27]
End of 4th Cavalry Division's campaign
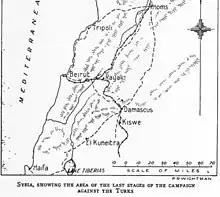
The EEF was still in vastly superior strength to the enemy in the area when Allenby made the initial decision to push the 4th and 5th Cavalry Divisions as far as the Rayak to Beirut line.[49] Desert Mounted Corps numbers, however dropped dramatically each day as increasing numbers of men became ill, weakening the corps' effectiveness.[50]
On 14 October, the 4th Cavalry Division moved to Shtora 3,000 feet (910 m), in the Rayak Valley.[43] Maunsell described the scene in the following passage: "This was magnificent, very fertile, and with many fruit trees. It was also a great grain–growing area. There were many wine factories at Shtora. The slopes of the Lebanon were covered with vineyards. The Anti–Lebanon, that is the range on the Damascus side of the valley, are pretty bare and resemble the Indian Frontier. At Shtora the surplus horses were left behind. They far outnumbered the men and it was with the utmost difficulty that they could be moved about. One man was leading five horses in Jacob's Horse, and the British units had to drive animals like herds."[43]
On 16 October, the 4th Cavalry Division arrived at Baalbek on the plain between the Lebanon and Anti-Lebanon mountains, where the days were hot and the nights cool. Here was found a good supply of water and tibben (bhoosa), but the division was "immobilised by losses through sickness" when a particularly virulent epidemic of malaria (malignant tertian) and influenza suddenly broke out.[38] The division evacuated almost 80 per cent of the troopers; 3,600 were sick of whom 400 died.[43][Note 3] Allenby and Chauvel spent some days visiting the troopers while the division was at Ba'albek with a brigade at Lebwe.[51] According to Maunsell, "the Middlesex Yeomanry were down to twenty-six officers and men, while Jacob's Horse had an average of twenty-five men per squadron only. The difficulty of looking after the horses can be imagined and we had to have numbers of Turk prisoners to help."[43]
The 5th Cavalry Division began their advance to Aleppo on 20 October, when the 4th Cavalry Division, reduced to 1,200 through the effects of sickness, was to move north to garrison Homs.[52] But Falls notes that it was unable to do so "still less to support the 5th in case of need at Aleppo."[53] Thus, Maunsell writes, "the Great War, so far as the 4th Cavalry Division was concerned, was ended."[54]
Reorganisation of 5th Cavalry Division
At Baalbek, General MacAndrew reorganised his 5th Cavalry Division into two columns; the lead unit Column "A" consisted of the divisional headquarters, 24 cars in three batteries of armoured cars, and three light car patrols armed with machine guns, supported by the 15th Imperial Service Cavalry Brigade (less the Hyderabad Lancers on the line of communications).[55][Note 4] The country was "fairly flat" with a good surface for the cars to negotiate and with their heavy machine–gun fire they were a strong raiding force.[55][Note 5]
5th Cavalry Division and Sherifial Force pursuit
The 5th Cavalry Division had not been so badly affected by sickness and was able to continue the pursuit as it had garrisoned Afulah and Nazareth well away from the mosquito infested areas along the Jordan River. Nor were they involved in the fighting at Jisr Benat Yakub, when they were in reserve to the Australian Mounted Division.[56] Allenby now ordered the 5th Cavalry Division to advance to Homs while the 4th Cavalry Division, which barely had enough men to carry out normal camp duties, remained to garrison the Zahle-Rayak-Baalbek area.[32]
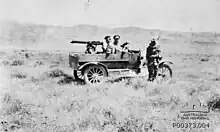
The 5th Cavalry Division was organised into two columns for the pursuit to Homs. The leading column consisted of the 13th Cavalry Brigade commanded by Brigadier General G. A. Weir (who succeeded P. J. V. Kelly),[Note 6] "B" Battery HAC and armoured cars, with the remainder of the division in the rear column, a day's march behind.[51] Chauvel ordered them to advance up the Nahr el Litani valley between the Lebanon and Anti Lebanon mountain ranges, while 1,500 regular Hejaz soldiers commanded by Nuri Bey part of the Sharif of Mecca's Sherifial Force commanded by Prince Feisal, covered the cavalry's right flank by advancing north along the main Damascus to Homs road.[33][57] The leading column of the cavalry reached Lebwe on 13 October, El Qa'a on 14 October and El Quseir on 15 October a total of 44 miles (71 km) passing through the fertile plain of the Nahr el Litani valley where bread, meat and grain was easily requisitioned at each place.[51]
Occupation of Homs
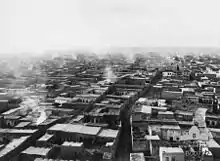
The Fourth Army commanded by Djemal Kuchuk had been ordered to form a rearguard to hold Homs for as long as possible, while von Oppen's Asia Corps (formerly part of the Eighth Army) continued on to Aleppo where Mustapha Kemal and the remnants of his Seventh Army were preparing defenses.[33] On 16 October the headquarters of the Fourth Army at Homs was encircled and captured although it had been reported for some days that Homs had been evacuated.[10][51]
The armoured cars, 13th Cavalry Brigade and Nuri Bey's Sherifial Force arrived in the city of 70,000 with its crusader castle, on 16 October.[33] By then the 7th (Meerut) Division had captured Beirut and Tripoli on the Mediterranean coast, anticipated rearguards from fresh Ottoman reinforcements had not been encountered and the RAF reported Hama, 27 miles (43 km) north of Homs, unoccupied. On 18 October Allenby ordered Chauvel to prepare to push the 5th Cavalry Division north on 20 October and to capture Aleppo by 26 October. Allenby had ordered the 2nd Light Car Patrol and the 2nd Light Armoured Motor Battery which had been attached to the 7th (Meerut) Division (XXI Corps) to join the 5th Cavalry Division at Homs.[58]
.jpg.webp)
The 5th Cavalry Division's fighting strength of 2,500 included the strongest column of armoured cars so far employed in the theatre. These included the 2nd, 11th and 12th Light Armoured Motor Batteries and the 1st (Australian), 2nd and 7th Light Car Patrols.[59]
The 2nd Light Car Patrol drove from Sollum in the Western Deserts on the Egypt and Libya border on 11 October, to El Hamman. On 13 October they travelled by train from El Hamman to Alexandria on the Khedivial Railway to reach railhead at Lydda on 15 October. From Lydda they drove via Tulkarm on 16 October, Acre on 17 October, Beirut on 18 October, Homs on 20 October to be in action north of Hamma the next day having travelled 1,200 miles (1,900 km); half by road in ten days.[60]
The 4th Cavalry Division was to advance to Homs in support.[59] When Chauvel reported the 4th Cavalry Division unable to move, Allenby decided not to risk the 5th Cavalry Division against Aleppo 120 miles (190 km). He considered the city too remote an objective, with the increasing threat of encountering effective rearguards the further north they rode, and he ordered the pursuit to stop at Hama.[35][61]
Occupation of Hama
The remaining soldiers in the 48th Infantry Regiment which had been part of the 16th Division, Asia Corps (formerly Eighth Army) at the beginning of the Battle of Megiddo on 19 September,[62] set up a rearguard at Hama. However, the rearguard was eventually forced to withdraw on 19 October as Desert Mounted Corps approached.[10]
Allenby had ordered the 5th Cavalry Division to continue the pursuit from Homs 120 miles (190 km) north to Aleppo on 20 October, with the 4th Cavalry Division advancing to occupy Homs, in support.[53][61] However, the 4th Cavalry Division had been reduced by sickness to a strength of 1,200 by 20 October and was unable to move.[61][63] The pursuit was to be reinforced by Feisal, who "promised to despatch 1,500 troops from Homs under Sherif Nasir, and hoped to raise some thousands more of local Arabs on his march."[53] This was in addition to the 1,500 regular Hejaz Sherifial Force commanded by Nuri Bey already guarding the right flank of the cavalry division.[33][57]
However, when Allenby heard the 4th Cavalry Division could not support the pursuit, he decided not to risk a division against remote objectives, which could become vulnerable to capture the further north they rode, and ordered the pursuit stopped. The 5th Cavalry Division was to remain to occupy Hama a city of 60,000 which had already been captured before 20 October by Feisal's Sherifial Force.[35][61][63]
The order to stop the pursuit reached Macandrew, commanding the 5th Cavalry Division, after his first day's march from Homs towards Hama, in the evening of 20 October. His reply reads:
Not understood. Troops far in advance, and I propose advancing with armoured cars to Aleppo. Believe the railway road avoids all blown bridges. Shall be in Hama by midday tomorrow, which is already occupied. No opposition worth thinking of expected at Aleppo. Hoped advance may secure engines and rolling stock.
Chauvel asked for clarification from Allenby after receiving Macandrew's message. Allenby changed his mind, approving the advance to Aleppo on 21 October 1918.[65]
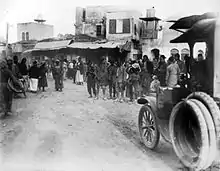
The retreating Yildirim Army Group had blown up the bridge over the Orontes River at Er Rastan 10 miles (16 km) north of Homs.[66] The 15th Imperial Service Cavalry Brigade (5th Cavalry Division) with the 5th Field Squadron R. E. arrived to repair the span of the bridge on 19 October. Repairs were complete by 06:00 on 21 October and by that afternoon the 5th Cavalry Division's headquarters, the 15th Imperial Service Cavalry Brigade (less the Hyderabad Lancers on the lines of communication south of Damascus) and the armoured cars arrived at Hama.[67]
Pursuit continues towards Aleppo
Column "A" of Macandrew's 5th Cavalry Division continued the pursuit on 21 October to reach 5 miles (8.0 km) north of Hama.[68]
I've sent a lot of armoured cars with the 5th; and it will have strong fire power.
— Allenby to Wilson report to the War Office 22 October 1918[69]
.jpg.webp)
The armoured cars conducted an extended reconnaissance on 22 October to reach Ma'arit el Na'aman, 35 miles (56 km) away at noon without sighting the enemy. They continued their journey another 7 miles (11 km) towards Aleppo to arrive near Khan Sebil, 44 miles (71 km) north of Hama and half way to Aleppo, at 14:30.[66][68] Here "they sighted some enemy armoured cars and armed motor lorries."[70] A 15 miles (24 km) running battle was fought between the mobile forces of one German armoured car and six lorries and the 5th Cavalry Division's armoured cars.[66][68] The "German armoured car, two armed lorries, and thirty–seven prisoners" were subsequently captured.[70][Note 7]
The 5th Cavalry Division's armoured cars eventually reached Zor Defai 50 miles (80 km) from Hama and only 20 miles (32 km) south of Aleppo, in the late afternoon of 22 October before they turned back to just north of Khan Seraikin, where they bivouacked at Seraqab 9 miles (14 km) from Khan Sebil and 30 miles (48 km) from Aleppo.[66][70] The 15th (Imperial Service) Cavalry Brigade reached Khan Shaikhun late in the afternoon of 22 October.[70][Note 8]
Air support
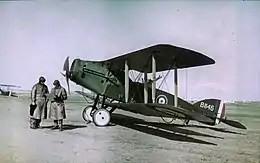
Bristol Fighters of No. 1 Squadron moved their base forward from Ramleh to Haifa and by mid October were required to patrol and reconnoitre an exceptionally wide area of country, sometimes between 500 and 600 miles (800 and 970 km), flying over Rayak, Homs, Beirut, Tripoli, Hama, Aleppo, Killis and Alexandretta in support of the pursuit by the 15th Imperial Service Cavalry Brigade and the armoured cars of Desert Mounted Corps.[71]
They conducted aerial reconnaissances and bombing raids, bombing the German aerodromes at Rayak on 2 October where 32 German machines, were seen three hours later by two Bristol Fighters to have been abandoned or burnt. On 9 October five Bristol Fighters attacked with bombs and machine–guns, troops getting on trains at Homs railway station. A similar attack took place on 16 October when trains at Hama station were the target. On 19 October the first German aircraft seen in the air since the aerial fighting over Deraa, a D.F.W. two–seater was forced to land. The aircraft was destroyed on the ground by firing a Very light into the aircraft after the German pilot and observer had moved to safety. The Mouslimie railway junction of the Baghdad and Palestine railways north of Aleppo, was bombed on 23 October and at noon five Australian aircraft bombed the city and Aleppo railway station.[71][Note 9]
Sherifial Force captures Aleppo
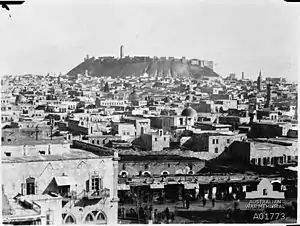
The ancient city of Aleppo, which had been incorporated into the Ottoman Empire in 1516 with a population by the beginning of the First World War of 150,000, is 200 miles (320 km) north of Damascus and a few miles south of the strategically important railway junction of the Palestine and the Mesopotamian railway systems at Mouslimie Junction.[35][72][73] Mustapha Kemal, commander of the Seventh Army, and Nihat Pasha, commander of the Second Army, organised the 6,000 to 7,000 soldiers to defend Aleppo.[61][70]

When the armoured cars attached to the 5th Cavalry Division reached the southern defences on 23 October, the commander of the 7th Light Car Patrol under a flag of truce demanded Mustapha Kemal surrender Aleppo, which was rejected.[74][75]
While an attack was planned by the commander of the armoured cars to take place on 26 October, Sherifial forces commanded by Colonel Nuri Bey and Sherif Nasir following an unsuccessful daylight attack on 25 October proceed that night with a successful attack. They captured Aleppo after fierce hand-to-hand fighting through the city streets which lasted most of the night.[68][70][76][77][Note 10]
Advance to Haritan
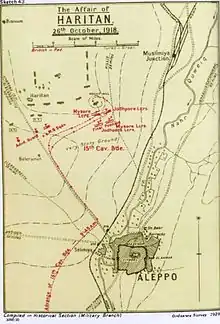
After the capture of Aleppo, the remnant of the Seventh Army commanded by Mustapha Kemal which had withdrawn from Damascus, was now deployed to the north and northwest of that city. The Second Army of about 16,000 armed troops commanded by Nihad Pasha was deployed to the west in Cilicia and the Sixth Army with another 16,000 armed troops commanded by Ali Ihsan which had been withdrawn from Mesopotamia was to the northeast around Nusaybin. These Ottoman forces grossly outnumbered the 15th Imperial Service Brigade.[78][79]
However, on 26 October the Jodhpore and Mysore lancer regiments of the 15th Imperial Service Cavalry Brigade without artillery support, but with a subsection of the 15th Machine Gun Squadron, as part of Macandrew's preempted attack on Aleppo, advanced over a ridge to the west of the city to cut the Alexandretta road. They continued their advance north west of Aleppo towards Haritan.[70][80]
A strong Ottoman column was seen retiring north of Aleppo along the Alexandretta road by the 15th Imperial Service Cavalry Brigade. The Mysore Lancers advanced at the charge; three squadrons in line of squadron columns, the fourth squadron in support to capture a rearguard position held by 150 Ottoman soldiers armed with rifles and artillery. About 50 survived and 20 were taken prisoner. The Jodhpur and Mysore Lancers made a second unsuccessful charge after the position had been strong reinforced by as many as 2,000 soldiers commanded by Mustapha Kemal.[81][82][83] Fighting continued throughout the day until at about 23:00 when the 14th Cavalry Brigade (5th Cavalry Division) arrived and the Ottoman force withdrew ending the last engagement of the war in the Middle East.[83]
During the 38 days between 19 September and 28 October, the 15th Imperial Service Cavalry Brigade had ridden 567 miles (912 km) and the 5th Cavalry Division had fought six actions, with the loss of 21 percent of its horses.[49]
5th Cavalry Division operations
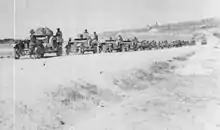
While the 15th Imperial Service Cavalry Brigade withdrew to the Aleppo area, the remainder of the 5th Cavalry Division; the 14th Cavalry Brigade which had arrived at 23:00 on 26 October and the 13th Cavalry Brigade conducted a reconnaissance on 27 October when a rearguard position was encountered 3.5 miles (5.6 km) north of Haritan.[84] The next day armoured cars reported the rearguard had withdrawn 5 miles (8.0 km) to Deir el Jemal. On 29 October, Sherifial Arabs occupied Muslimiya Station; the junction of the Baghdad and Palestine railways, cutting communications between Constantinople and Mesopotamia, ending Ottoman control of 350 miles (560 km) of territory. By 30 October the rearguard position at Deir el Jemal had not withdrawn and 4 miles (6.4 km) to the north a new 25 miles (40 km) long defensive line, in part crossing the Alexandretta road had been established. This line was defended by a force six times greater than Macandrew's, made up of the newly created XX Corps' 1st and 11th Divisions with between 2,000 and 3,000 soldiers sourced from drafts and a reinforcement of one complete regiment, and the 24th and 43rd Divisions commanded by Mustapha Kemal Pasha who had his headquarters at Katma. The 5th Cavalry Division kept this line under observation while waiting to be reinforced by the Australian Mounted Division.[85][86]
Australian Mounted Division advance
The Australian Mounted Division was ordered to advance to reinforce Macandrew's 5th Cavalry Division at Aleppo.[87] Chauvel ordered Major General H. W. Hodgson's Australian Mounted Division to advance to Aleppo 200 miles (320 km) away. The division marched out of Damascus on 27 October riding through Duma and Nebk east of the Anti-Lebanon range to reach Homs on 1 November; where they learned the war against the Ottoman Empire was finished.[75][88][89]
Four regiments of the division, along with the 4th Light Horse Brigade headquarters had been deployed at Kuneitra on the lines of communication since 28 September.[90] The 3rd Light Horse Brigade had been deployed in the Damascus area along with the 4th and 12th Light Horse Regiments on guard duty.[91][92] The 10th Light Horse Regiment had been deployed to Kaukab and placed in charge of the prisoner of war camp there until 30 October when they too moved out for Homs.[93][94]
The advance of the Australian Mounted Division began on 25 October when the garrison at Kuneitra moved out leaving the Hyderabad Lancers to continue guard duties. They joined the division at El Mezze at 15:30 on 26 October when the 4th and 12th Light Horse Regiments rejoined their 4th Light Horse Brigade. The ration strength of the division on 26 October was 4,295 soldiers. Orders to advance to Homs were received on 27 October and they left Damascus the next day.[95][96][97]
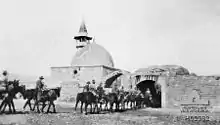
After reveille at 05:00 the 12th Light Horse Regiment marched out at 10:30 on 28 October to join the 4th Light Horse Brigade at 12:00 before marching through Damascus to Khan Kussier where they arrived at 17:00. After reveille at 05:30 and watering at 07:00 on 29 October, the march resumed at 09:00 arriving at Kuteife at 13:15 to bivouac. After reveille at 04:00 the march was resumed at 06:00 on 30 October, arriving at Kustul at 12:00 where they halted 1 hour and 15 minutes before proceeding on to Nebk where they arrived at 15:55 and bivouacked for the night. At 07:45 on 31 October the march was resumed, arriving at Kara at 11:30 where they lunched and the horses were watered before resuming the march at 13:15 to arrive at Hassie at 19:00 to bivouac for five hours. At 23:00 the march was resumed to Homs where they arrived at 08:30 on 1 November 1918 "all weary & tired." The 12th Light Horse Regiment suffered 58 casualties during this advance.[95] The 4th Light Horse Brigade evacuated 60 soldiers to the 4th Light Horse Field Ambulance during the march from Damascus to Homs.[98]
They had ridden 156 kilometres (97 mi) in four days to reach the small village of Jendar 18 miles (29 km) south of Homs at 21:00 on 31 October, or near Hassie at 16:00 on 31 October, when Hodgson received news of the armistice by wireless.[89][99][100] The armistice was concluded on 31 October. Wavell noted that this was "three years almost to a day since Turkey had entered the war,"[87] while Jones highlighted the fact that it was "a year to the day after the charge at Beersheba."[100] As there was no water in the area the Australian Mounted Division continued their march to arrive at Homs at 08:00 on 1 November having ridden 50 miles (80 km) during their last advance.[89][99][100]
Word travelled head–to–tail down the hurrying squadrons and there was an almost imperceptible relaxation; a slackening of reins, an easing of shoulders, a slight slump. The hoofbeats momentarily slowed. Then attention returned to the day and the hour and to reaching Homs before daylight and they picked up the rate again. This armistice march covered 50 miles. Indians, British and French took it similarly, with only a moment's pause. All were too wrung out to celebrate and too unnerved by tragedy. In Damascus, they had been shaken by the thousands of non–combat deaths and left depressed and weary beyond expression. Only at the next halt, and in quiet moments of the next weeks and months, did they allow themselves to dwell on the fact with utter thankfulness. It was over.
— Sergeant Byron 'Jack' Baly, 7th Light Horse Regiment[101]
.jpg.webp)
On 3 November, the Armistice with the Austria-Hungarian Empire was concluded and the Australian Mounted Division (less the 5th Light Horse Brigade which remained at Homs) began their last ride. The rode from Homs to Tripoli on the Mediterranean coast, where they remained until being shipped back to Egypt at the end of February 1919.[89][102][103] The 4th Light Horse Brigade was still at Homs the next day when Chauvel visited their camp and inspected the men and horses.[103]
Aftermath
General Wavell's figures of 75,000 prisoners and 360 guns captured by the EEF between 18 September and 31 October were also quoted in the Turkish official history of the campaign.[10] In 38 days of fighting 350 miles (560 km) of Ottoman Empire territory had been occupied by the EEF along with more than 100,000 prisoners and unknown casualties.[104][Note 11]
According to Falls, "the thoroughness of the Turkish defeat is almost without a parallel in modern military history."[84] This successful campaign resulted from "careful planning and bold execution. Combined and coordinated use of artillery, infantry, the RAF and cavalry were all essential aspects of the plan. However, what transformed the battle from a successful penetration of the 8th Turkish army's front into a great battle of annihilation that ended in the total destruction of three armies was the adroit and bold use of cavalry ... by two cavalry generals, Allenby and Chauvel."[105]
As regards both the numbers engaged and the results achieved, the campaign in Palestine and Syria ranks as the most important ever undertaken by cavalry. In the first series of operations our troops made a direct advance of 70 miles (110 km) into enemy territory, and captured some 17,000 prisoners and about 120 guns. The final operations resulted in an advance of 450 miles (720 km), the complete destruction of three Turkish Armies, with a loss of about 90,000 prisoners and 400 guns, and the overwhelming defeat of what had hitherto been considered one of the first–class Military Powers.[106]
The EEF had suffered the loss of 782 killed and 4,179 wounded soldiers.[107] Between 19 September and 31 October the casualties totalled 5,666; Desert Mounted Corps suffering 650 of these. The total battle casualties of the Suez Canal, the Sinai, the Levant and the Jordan campaigns; from January 1915 totalled 51,451.[108]
Tuesday 16 December was selected as a day of thanksgiving for victory throughout the EEF when religious services were held during the morning with games and sports organised for the afternoon.[89]
Yildirim Army Group

Liman von Sanders was recalled to Constantinople on 30 October when Ahmet Izzet Pasa, the Ottoman Minister of War appointed Mustafa Kemal Pasa to command the Yildirim Army Group headquartered at Adana. Here Mustafa Kemal began to plan the defense of Anatolia with the Ottoman Army still "in the field."[109]
The force Mustapha Kemal commanded "would have met the fate of the rest within a few weeks, when a frontal attack would have been combined with a landing at Alexandretta." It was saved by the Armistice.[110]
Armistice
These enormous losses and the threat from the EEF were not alone responsible for the armistice; General Milne's army was advancing towards Thrace and Constantinople to threaten Anatolia. In addition, Erickson argues that "the Salonika beachhead created a strategic crisis for which there was no answer."[111]
The Ottoman Empire's highest-ranking British prisoner, Major General CharlesTownshend, was sent to Lesbos where he announced the Ottoman Empire's "intention to seek an armistice." Negotiations took place at Mudros and, as Erickson recounts, the "armistice was signed on the deck of the battleship Agamemnon on October 30, 1918."[112]
Writing in 1920, Dinning described how the news was received amongst the troops around Baalbek: "We parked outside the lights of Baalbek ... The news of the Turkish Armistice, beginning this midday, had just come through. I think the dinner was a sort of thanksgiving meal. There was most excellent good soup, a roast pigeon each, some sweets and savoury, and flagon after flagon of cocoa – good for this nipping and eager air, for this is the opening of winter. The alternative to this had been bully beef and jam.[113]
Chauvel was in Aleppo when the armistice with the Ottoman Empire was announced.[114] Eleven days later the war in Europe also came to an end.[115]
Implementation of the armistice
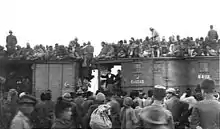
The terms of the Armistice are tough. The first, in which our troops are naturally most interested, is that as from today the Dardanelles are opened, with free access to the Black Sea. So what the allied troops failed to do on Gallipoli in 1915, with such tragic loss, has at last been achieved on another front. Other Armistice terms include : The immediate demobilisation of the Turkish Army; the surrender of all war vessels; the release of all allied prisoners; the surrender of all Turkish ports, garrisons and officers; and most important, Turkey to cease all relations with the Central Powers.[116]
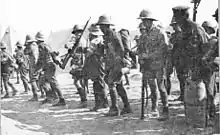
There are other views of the armistice and its implementation:
Unlike Germany, the Ottoman Empire signed an armistice that did not require the immediate demobilisation of its army and the surrender of its weapons. Rather this [demobilisation] would be co–ordinated with the British authorities and would be contingent upon internal and external security requirements. In fact, the Ottoman General Staff, under the newly appointed Minister of War, Ahmet Izzet Pasa, sent out telegraphic instructions concerning the implementation of the armistice on 31 October 1918 that outlined the timelines and geographical parameters of the turn over of strategic points to the allies. By late November, the Ottoman General Staff had completed the reorganisation process and issued orders to all corps and divisions assigning them to peacetime garrisons within the Anatolian heartland ... the Ottoman General Staff itself continued in existence and continued to function as a directing staff.[117]
The terms of the Armistice required the Ottoman Empire:
to withdraw their forces from the border province, Cilicia, leaving only the few troops required for internal security and frontier duties ... [but] The Turkish army commanders pleaded ignorance of the terms of the Armistice, they tried delay and evasion ... Mustapha Kemal went so far as to tell Chauvel's representative that he had no intention of carrying out the Armistice.
Chauvel, from his GHQ at Homs recommended the removal of Mustapha Kemal who subsequently lost command of the Seventh Army.[78]
No. 1 Squadron AFC
After the armistice No. 1 Squadron AFC moved back to Ramleh in December 1918 and Kantara in February 1919.[118]
On 19 February Allenby addressed the squadron:
Major Addison, officers, and men: It gives me considerable pleasure to have this opportunity of addressing you prior to your return to Australia. We have just reached the end of the greatest war known to history. The operations in this theatre of the war have been an important factor in bringing about the victorious result. The victory gained in Palestine and Syria has been one of the greatest in the war, and undoubtedly hastened the collapse that followed in other theatres. This squadron played an important part in making this achievement possible. You gained for us absolute supremacy of the air, thereby enabling my cavalry, artillery, and infantry to carry out their work on the ground practically unmolested by hostile aircraft. This undoubtedly was a factor of paramount importance in the success of our arms here. I desire therefore personally to congratulate you on your splendid work. I congratulate you, not only the flying officers, but also your mechanics, for although the officers did the work in the air, it was good work on the part of your mechanics that kept a high percentage of your machines serviceable. I wish you all bon voyage, and trust that the peace now attained will mean for you all future happiness and prosperity. Thank you, and good-bye.
— General Allenby speech given to No. 1 Squadron on 19 February 1919[119]
Occupation
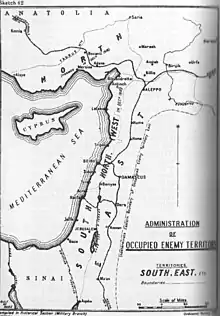
According to Bruce, the "success of the Allied campaign in the Middle East between 1914 and 1918, which helped to bring down an empire, was never matched by its political outcomes."[120] On 23 October, Allenby reported to the War Office that he had appointed Major General Sir A. W. Money chief British administrator of Palestine, the Occupied Enemy Territory South, Colonel de Piépape to administer the future French Zone Occupied Enemy Territory North and General Ali Pasha el Rikabi to administer the Occupied Enemy Territory East.[26] Northforce commanded by Major General Barrow and consisting of the 4th and 5th Cavalry Divisions and two divisions of infantry took over administration of the captured territory. They garrisoned places up the coast to Smyrna, and administered the Baghdad Railway from Constantinople to the railhead east of Nisibin in Mesopotamia until the administration of northern Syria was given to the French.[121]
Allenby was informed on 27 October that he was to be the sole intermediary on political and administrative questions to do with the Arab Government.[122]
Wingate wrote to Allenby on 2 November:
It will be interesting to see Hedjaz developments and how the various Turkish Commanders take their orders in Asyr and Yemen – also in Tripolitania and Cyrenaica ... I am glad to hear from you that Sykes–Picot and Co. are coming out: their original agreement will need much alteration if not complete scrapping – when as you say they see the dangers on the spot.
The objectives of peace in the region were declared on 7 November 1918. Falls writes, "the goal aimed at by France and Great Britain in their conduct in the East of a war unchained by German ambition is the complete and definite freedom of the peoples so long oppressed by the Turks, and the establishment of national governments and administrations deriving their authority from the initiative and free choice of the native population."[124]
At Versailles, however, France demanded the enforcement of the Sykes-Picot Agreement and the Arab zone was divided in two; the southern portion became the Transjordan with French Syria in the north.[125] According to Bruce, "in Palestine it became clear that the price of a permanent imperial presence was likely to be high, as violence flared soon after the end of the war."[120]
Anti-British and anti-Armenian demonstrations led Allenby to order Chauvel to occupy the towns of Marash, Urfa, Killis and Aintab and dismiss the Ottoman commander of the Sixth Army, Ali Ihsan. To carry out these orders required Desert Mounted Corps to move to Aleppo and be reinforced by an infantry brigade, but there was some delay in the remainder of the 4th and 5th Cavalry Divisions moving north and Allenby "went to Constantinople by battleship, interviewed the Turkish ministers for Foreign Affairs and the Army and demanded the acceptance of his conditions and the removal of Ali Ihsan without discussion ... his terms were accepted."[78]
In the aftermath, conflict in the region continued. Bruce notes that "the conflicting claims of Jews and Arabs eventually led to the development of open warfare between them in 1937 and was to lead to the ending of the British mandate in 1948. The territorial claims of the two groups still remain unreconciled and their relationship continues to be characterized by sporadic violence and discord."[120]
Notes
- ↑ At the Nahr el Kelb/Dog River invaders from the Egyptian Rameses II, Babylonian, Assyrian Roman and Ottomans left an engraved record inscribes onto the cliffs (Commemorative stelae of Nahr el-Kalb). These were joined by World War I inscriptions. [Falls 1930 Vol. 2 p. 603] [Hall 1967 p. 101] The XXI Corps added an inscription reading "The XXI British Army Corps with Le Detachment Français de Palestine et Syrie occupied Beirut and Tripoli October 1918 AD". See: National Archives of Australia
- ↑ The 5th Cavalry Division has been described as including the 5th Mounted Brigade but only the 1/1st Gloucester Yeomanry from that brigade were in the 5th Cavalry Division [Woodward 2006 p. 206] [Falls 1930 Vol. 2 pp. 661, 667]
- ↑ The 4th Cavalry Division had been garrisoning Beisan and engaged in operations to cut the last remaining lines of retreat across the Jordan River north from Jisr ed Damieh. During this time it is possible they were struck by the same malarial attack that had afflicted those units of Chaytor's Force which had held the Jisr ed Damieh crossing.
- ↑ The 15th Imperial Service Cavalry Brigade, fielded by Indian Princely States, had seen service in the theatre since 1914; from the defence of the Suez Canal onwards including garrison duties defending the bridgehead on the Jordan River. [Falls 1930 Vol. 2 Part II pp. 423–4]
- ↑ Column "A" was followed a day later by the 13th and 14th Cavalry Brigades. [Wavell p. 231]
- ↑ See Battle of Nazareth (1918) and Second Transjordan attack on Shunet Nimrin and Es Salt.
- ↑ One lorry which broke down was captured along with five prisoners, 24 Ottoman soldiers were killed during the fighting. [Falls 1930 Vol. 2 p. 612]
- ↑ The 15th Cavalry Brigade was two days march away. [Falls p. 612]
- ↑ The Mouslimie railway junction should not be confused with the Messudieh railway junction in the Judean Hills. [Keogh 1955 pp. 243–4]
- ↑ See also film of the 1st Australian Light Car Patrol entering Aleppo: Australian War Memorial Collection F00049
- ↑ Falls gives over 27,000 to 2 October; Gullett credits Australian Mounted alone with 31,335 to 2 October; Chauvel reported 48,826 caught by his Corps in September and 29,636 in October. Divisional counts in Desert Mounted Corps and Chaytor's Force reached 83,700. Taking into account the large numbers captured in Damascus and elsewhere who subsequently died or who were employed to do the work of sick members of the EEF, Chauvel put the total nearer 100,000 than the official figure of 75 000, which was the number counted at Ismailia. [Hills p. 190 note]
Citations
- ↑ British Army EEF 1918 p. 61
- ↑ British Army EEF 1918 p. 65
- ↑ Wilson to Allenby 24 September 1918 in Hughes 2004 p. 186
- ↑ Wilson to Allenby received 24 September 1918 in Woodward 2006 p. 203
- ↑ Massey 1920 p. 188
- ↑ Bruce 2002 pp. 248–9
- ↑ Wavell 1968 p. 230
- ↑ Allenby to Wilson, 25 September 1918 in Woodward 2006 pp. 203–4
- 1 2 Hughes 2004 p. 188
- 1 2 3 4 5 6 Erickson 2001 p. 201
- 1 2 Falls 1930 Vol. 2 p. 594
- 1 2 Falls 1930 Vol. 2 p. 595
- ↑ Bruce 2002 p. 248
- ↑ Falls 1930 Vol. 2 p. 563
- 1 2 Wavell 1968 pp. 230–1
- 1 2 3 4 5 6 Bruce 2002 p. 251
- 1 2 3 Falls 1930 Vol. 2 pp. 602–3
- ↑ Falls 1930 Vol. 2 pp. 602–3, 670
- ↑ Falls 1930 Vol. 2 p. 670
- 1 2 3 4 Falls 1930 Vol. 2 p. 603
- 1 2 3 Falls 1930 Vol. 2 p. 601
- 1 2 3 Gullett 1941 pp. 776–7
- ↑ Allenby report to War Office 8 October 1918 in Hughes 2004 p. 204
- ↑ Rothon Diary 10 October 1918 in Woodward 2006 p. 204
- ↑ Falls 1930 Vol. 2 p. 604
- 1 2 3 4 5 Falls 1930 Vol. 2 p. 607
- 1 2 in Hughes 2004 pp. 205–6
- ↑ in Hughes 2004 p. 300
- 1 2 3 Falls 1930 Vol. 2 p. 605
- 1 2 Bruce 2002 pp. 251–2
- ↑ Rothon Diary 18 October 1918 in Woodward 2006 p. 205
- 1 2 3 4 5 6 7 8 Preston 1921 pp. 284–5
- 1 2 3 4 5 6 Bruce 2002 p. 252
- ↑ Downes 1938 p. 741
- 1 2 3 4 Hill 1978 p. 188
- ↑ Falls 1930 Vol. 2 p. 613 note, p. 617 note
- ↑ Falls 1930 Vol. 2 pp. 604–5
- 1 2 Downes 1938 pp. 735–6
- ↑ Gullett 1941 p. 776
- ↑ Keogh 1955 p. 253
- ↑ Bruce 2002 pp. 249–51
- ↑ Falls 1930 Vol. 2 pp. 601, 667
- 1 2 3 4 5 6 Maunsell 1926 pp. 238–9
- ↑ Woodward 2006 p. 204
- 1 2 Bruce 2002 p. 250
- 1 2 3 Falls 1930 Vol. 2 p. 602
- ↑ Cutlack 1941 p. 169
- ↑ Dinning 1920 p. 105
- 1 2 Blenkinsop 1925 pp. 242–3
- ↑ Baly 2003 p. 302
- 1 2 3 4 Falls 1930 Vol. 2 p. 606
- ↑ Falls 1930 Vol. 2 pp. 610–11
- 1 2 3 Falls 1930 Vol. 2 p. 611
- ↑ Maunsell 1936 p. 240
- 1 2 Preston 1921 p. 285
- ↑ Blenkinsop 1925p. 242
- 1 2 Falls 1930 Vol. 2 pp. 604–6
- ↑ Falls 1930 Vol. 2 pp. 607, 610
- 1 2 Falls 1930 Vol. 2 p. 610
- ↑ Falls 1930 Vol. 2 p. 610 note
- 1 2 3 4 5 Bruce 2002 pp. 253–4
- ↑ Erickson 2007 p. 149
- 1 2 Falls 1930 Vol. 2 pp. 611–2
- ↑ Falls 1930 Vol. 2 pp. 611–2 note
- ↑ Falls 1930 Vol. 2 p. 612 note
- 1 2 3 4 Falls 1930 Vol. 2 p. 612
- ↑ Falls 1930 Vol. 2 pp. 612–3
- 1 2 3 4 Wavell 1968 pp. 231–2
- ↑ in Hughes 2004 p. 210
- 1 2 3 4 5 6 7 Preston 1921 pp. 288–91
- 1 2 Cutlack 1941 pp. 168–71
- ↑ Bou 2009 pp. 196–7
- ↑ Falls 1930 Vol. 2 p. 616
- ↑ Falls 1930 Vol. 2 p. 613
- 1 2 Hill 1978 p. 189
- ↑ Falls 1930 Vol. 2 pp. 611, 613
- ↑ Bruce 2002 p. 255
- 1 2 3 Hill 1978 p. 191
- ↑ Falls 1930 Vol. 2 p. 613 note
- ↑ Falls 1930 Vol. 2 p. 613–4
- ↑ Wavell 1968 p. 232
- ↑ Falls 1930 Vol. 2 p. 615
- 1 2 Bruce 2002 p. 256
- 1 2 Falls 1930 Vol. 2 p. 617
- ↑ Falls 1930 Vol. 2 p. 617 and note
- ↑ Bruce 2002 p. 257
- 1 2 Wavell 1968 pp. 232–3
- ↑ Massey 1920 p. 314
- 1 2 3 4 5 Preston 1921 p. 294
- ↑ Falls 1930 Vol. 2 p. 569
- ↑ 3rd Light Horse Brigade War Diary AWM4-10-3-45
- ↑ 4th Light Horse Regiment War Diary AWM 4-10-9-45
- ↑ Falls 1930 Vol. 2 p. 599
- ↑ 10th Light Horse Regiment War Diary 8–18 October 1918 AWM4-10-15-40
- 1 2 12th Light Horse Regiment War Diary 24–27 October 1918 AWM4-10-17-19
- ↑ Australian Mounted Division War Diary October 1918 AWM4-1-59-16
- ↑ 4th Light Horse Brigade War Diary AWM4-10-4-22
- ↑ 4th Light Horse Brigade War Diary 31.10.18 AWM4-10-4-22
- 1 2 Gullett 1941 p. 779
- 1 2 3 Jones 1987 p. 158
- ↑ Baly 2003 p. 310
- ↑ Dinning 1920 pp. 139–41
- 1 2 4th Light Horse Brigade War Diary November 1918 AWM4-10-4-23
- ↑ DiMarco 2008 p. 332
- ↑ DiMarco 2008 p. 333
- ↑ Preston 1921 p. xii
- ↑ DiMarco p. 332
- ↑ Falls 1930 Vol. 2 p. 618 and note
- ↑ Erickson 2001 pp. 201, 203
- ↑ Falls 1930 Vol. 2 p. 618
- ↑ Erickson 2001 pp. 203–4
- ↑ Erickson 2001 p. 204
- ↑ Dinning 1920 pp. 105, 110–1
- ↑ Hill p. 190
- ↑ Woodward 2006 p. 206
- ↑ Hamilton 1996 pp. 150–51
- ↑ Erickson 2007 pp. 163–4
- ↑ Cutlack 1941 pp. 169, 171
- ↑ Cutlack 1941 p. 171
- 1 2 3 Bruce 2002 p. 268
- ↑ Preston 1921 p. 302
- ↑ DMO to Allenby 27 October 1918 in Hughes 2004 pp. 213–4
- ↑ Hughes 2004 p. 215
- ↑ Falls 1930 Vol. 2 p. 608
- ↑ Falls 1930 Vol. 2 p. 609
References
- "4th Light Horse Regiment War Diary". First World War Diaries AWM4, 10-9-45. Canberra: Australian War Memorial. September 1918.
- "10th Light Horse Regiment War Diary". First World War Diaries AWM4, 10-15-40. Canberra: Australian War Memorial. October 1918. Archived from the original on 2012-10-23. Retrieved 2012-10-29.
- "12th Light Horse Regiment War Diary". First World War Diaries AWM4, 10-17-19. Canberra: Australian War Memorial. October 1918. Archived from the original on 2011-03-16. Retrieved 2012-10-29.
- "3rd Light Horse Brigade War Diary". First World War Diaries AWM4, 10-3-45. Canberra: Australian War Memorial. October 1918. Archived from the original on 2011-03-21. Retrieved 2012-10-29.
- "4th Light Horse Brigade War Diary". First World War Diaries AWM4, 10-4-22. Canberra: Australian War Memorial. October 1918. Archived from the original on 2012-10-13. Retrieved 2012-10-29.
- "Australian Mounted Division Administration, Headquarters War Diary". First World War Diaries AWM4, 1-59-16. Canberra: Australian War Memorial. October 1918.
- Baly, Lindsay (2003). Horseman, Pass By: The Australian Light Horse in World War I. East Roseville, Sydney: Simon & Schuster. OCLC 223425266.
- Blenkinsop, Layton John; Rainey, John Wakefield, eds. (1925). History of the Great War Based on Official Documents Veterinary Services. London: HM Stationers. OCLC 460717714.
- Bou, Jean (2009). Light Horse: A History of Australia's Mounted Arm. Australian Army History. Port Melbourne: Cambridge University Press. ISBN 9780521197083.
- British Army, Egyptian Expeditionary Force (1918). Handbook on Northern Palestine and Southern Syria (1st provisional 9 April ed.). Cairo: Government Press. OCLC 23101324.
- Bruce, Anthony (2002). The Last Crusade: The Palestine Campaign in the First World War. London: John Murray. ISBN 978-0-7195-5432-2.
- Cutlack, Frederic Morley (1941). The Australian Flying Corps in the Western and Eastern Theatres of War, 1914–1918. Official History of Australia in the War of 1914–1918. Vol. VIII (11th ed.). Canberra: Australian War Memorial. OCLC 220900299.
- DiMarco, Louis A. (2008). War Horse: A History of the Military Horse and Rider. Yardley, Pennsylvania: Westholme Publishing. OCLC 226378925.
- Dinning, Hector W.; James McBey (1920). Nile to Aleppo. New York: MacMillan. OCLC 2093206.
- Downes, Rupert M. (1938). "The Campaign in Sinai and Palestine". In Butler, Arthur Graham (ed.). Gallipoli, Palestine and New Guinea. Official History of the Australian Army Medical Services, 1914–1918: Volume 1 Part II (2nd ed.). Canberra: Australian War Memorial. pp. 547–780. OCLC 220879097.
- Erickson, Edward J. (2001). Ordered to Die: A History of the Ottoman Army in the First World War: Foreword by General Hüseyiln Kivrikoglu. No. 201 Contributions in Military Studies. Westport Connecticut: Greenwood Press. OCLC 43481698.
- Erickson, Edward J. (2007). John Gooch; Brian Holden Reid (eds.). Ottoman Army Effectiveness in World War I: A Comparative Study. No. 26 Cass Military History and Policy Series. Milton Park, Abingdon, Oxon: Routledge. ISBN 978-0-203-96456-9.
- Falls, Cyril (1930). Military Operations Egypt & Palestine from June 1917 to the End of the War. Official History of the Great War Based on Official Documents by Direction of the Historical Section of the Committee of Imperial Defence: Volume 2 Part II. A. F. Becke (maps). London: HM Stationery Office. OCLC 256950972.
- Gullett, Henry S. (1941). The Australian Imperial Force in Sinai and Palestine, 1914–1918. Official History of Australia in the War of 1914–1918. Vol. VII (11th ed.). Canberra: Australian War Memorial. OCLC 220900153.
- Hamilton, Patrick M. (1996). Riders of Destiny The 4th Australian Light Horse Field Ambulance 1917–18: An Autobiography and History. Gardenvale, Melbourne: Mostly Unsung Military History. ISBN 978-1-876179-01-4.
- Hill, Alec Jeffrey (1978). Chauvel of the Light Horse: A Biography of General Sir Harry Chauvel, GCMG, KCB. Melbourne: Melbourne University Press. OCLC 5003626.
- Hughes, Matthew, ed. (2004). Allenby in Palestine: The Middle East Correspondence of Field Marshal Viscount Allenby June 1917 – October 1919. Army Records Society. Vol. 22. Phoenix Mill, Thrupp, Stroud, Gloucestershire: Sutton Publishing. ISBN 978-0-7509-3841-9.
- Jones, Ian (1987). The Australian Light Horse. Australians at War. Australia: Time-Life Books. OCLC 18459444.
- Keogh, E. G.; Joan Graham (1955). Suez to Aleppo. Melbourne: Directorate of Military Training by Wilkie & Co. OCLC 220029983.
- Massey, William Thomas (1920). Allenby's Final Triumph. London: Constable & Co. OCLC 345306.
- Maunsell, E. B. (1926). Prince of Wales' Own, the Seinde Horse, 1839–1922. Regimental Committee. OCLC 221077029.
- Preston, R. M. P. (1921). The Desert Mounted Corps: An Account of the Cavalry Operations in Palestine and Syria 1917–1918. London: Constable & Co. OCLC 3900439.
- Wavell, Field Marshal Earl (1968) [1933]. "The Palestine Campaigns". In Sheppard, Eric William (ed.). A Short History of the British Army (4th ed.). London: Constable & Co. OCLC 35621223.
- Woodward, David R. (2006). Hell in the Holy Land: World War I in the Middle East. Lexington: The University Press of Kentucky. ISBN 978-0-8131-2383-7.