| Charge at Khan Ayash | |||||||
|---|---|---|---|---|---|---|---|
| Part of the Middle Eastern theatre of World War I | |||||||
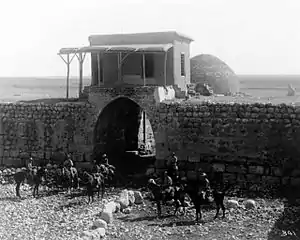
 Australian Light Horsemen at Khan Ayash | |||||||
| |||||||
| Belligerents | |||||||
|
|
| ||||||
| Commanders and leaders | |||||||
|
|
| ||||||
| Units involved | |||||||
|
3rd Light Horse Brigade Australian Mounted Division Desert Mounted Corps | 146th Regiment Army Troops, Fourth Army and unidentified cavalry | ||||||
| Casualties and losses | |||||||
| 2,000 prisoners | |||||||
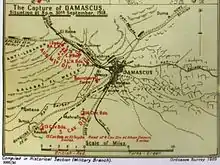
The Charge at Khan Ayash occurred on 2 October 1918 about 17 miles (27 km) north of Damascus after the pursuit to, and capture of Damascus, which followed the decisive Egyptian Expeditionary Force victory at the Battle of Megiddo on 25 September during the Sinai and Palestine Campaign of World War I. After Damascus had been encircled by Desert Mounted Corps on 30 September, the 3rd Light Horse Brigade advanced through the city on 1 October to charge and capture remnants of the Ottoman Yildirim Army Group withdrawing along the road north to Rayak and Homs.
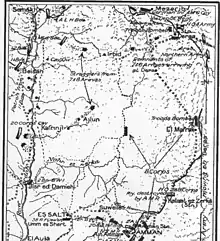
Following the victories at the Battle of Sharon and Battle of Nablus during the Battle of Megiddo, and the Capture of Damascus, remnants of the Seventh and Eighth Armies retreated in columns towards Damascus from the Judean Hills. Rearguards at Samakh, at Tiberias and at Jisr Benat Yakub were captured by the Australian Mounted Division. Remnants of the Fourth Army also retreated in columns towards Damascus along the Pilgrims' Road from Amman. The rearguard at Irbid was attacked by the 4th Cavalry Division and Deraa was captured by the Sherifial Army.
The last formation to leave Damascus, the 146th Regiment (Fourth Army) left during the night of 30 September, was followed early the next morning; 1 October by the 10th Light Horse Regiment (3rd Light Horse Brigade), in the process accepting the surrender of the city. The Australian light horsemen followed the retreating columns north along the road to Homs during the day, encountering numerous rearguards which were attacked and captured, until they we were stopped by strong defences protecting a 2,000-strong column near Khan Ayash. Early the next morning a large column of retreating German and Ottoman combatants was seen moving towards a pass just north of Khan Ayash. Two squadrons of the 9th Light Horse Regiment (3rd Light Horse Brigade) rode north to cut the road in front of the column while the third squadron charged into the column splitting it and forcing it to surrender.
Background
The day after the victory at the Battle of Megiddo, the pursuit to Damascus began on 26 September, when the 4th Cavalry Division advanced east across the Jordan River to Irbid and on to Deraa which was captured by Sherifial forces. The pursuit to Damascus 140 miles (230 km) away, continued with the cavalry division's right flank covered by Sherifial forces. Meanwhile, the Australian Mounted Division with the 5th Cavalry Division in reserve, began their 90 miles (140 km) pursuit to Damascus on 27 September around the northern end of the Sea of Galilee, also known as Lake Tiberias, via Jisr Benat Yakub and Kuneitra.[1][2][Note 1]
Yildirim Army Group retreat

By 26 September the Fourth Army's Amman garrison (less the rearguard captured at Amman) had not been "heavily engaged,"[3] and "was still intact as a fighting force even though it was in rapid retreat" north along the Hejaz railway and Pilgrims Road, some miles to the east of the Jordan River.[4]
Between 6,000 and 7,000 German and Ottoman soldiers from the Ottoman Fourth, Seventh and Eighth Armies had managed to retreat via Tiberias or Deraa, before these places were captured on 25 and 27 September, respectively.[5][6] At this time, the retreating columns which moved via Deraa were at or north of Muzeirib on their way to Damascus.[6]
Two days later, on 29 September, Mustafa Kemal Pasha, commander of the Seventh Army arrived at Kiswe, 50 miles (80 km) north of Deraa, and 9 miles (14 km) south of Damascus, with his army's leading troops. Here Liman von Sanders commanding Yildirim Army Group ordered him to withdraw to the north of Damascus, to Rayak.[7]
By the next morning, the leading column of the Fourth Army consisting of an Ottoman cavalry division and some infantry, was approaching Kiswe, followed along the Pilgrims' Road by the 4th Cavalry Division 30 miles (48 km) behind.[8][9]
Australian Mounted Division
During the cavalry phase of the Battle of Sharon the Australian Mounted Division's 3rd Light Horse Brigade had captured Jenin in the evening of 20 September 1918. By the next morning they had captured 8,000 remnants of the two Ottoman armies which had been fighting in the Judean Hills.[10]
Prelude
Yildirim Army Group
Liman von Sanders had ordered the 24th, 26th and 53rd Infantry Divisions, XX Corps (Seventh Army) and the 3rd Cavalry Division, Army Troops Fourth Army, under the command of Colonel Ismet Bey (commander of the III Corps Seventh Army) to defend Damascus, while the remaining Ottoman formations were ordered to retreat northwards.[11][12] The remains of the Tiberias Group which had defended Samakh and Tiberias, commanded by Jemal Pasha, (commander of the Fourth Army) had also been ordered to defend Damascus.[13] However, Liman von Sanders realised he could not defend the city and withdrew his Yildirim Army Group headquarters north to Aleppo.[14] Only von Oppen's force which had travelled by train direct to Rayak before the Barda Gorge was closed and the 146th Regiment remained "disciplined formations."[15]
The 146th Regiment was the last formation to leave Damascus; leaving during the night of 30 September. After hearing the Barada Gorge was captured von Hammerstein commanding the 146th Regiment, retreated along the Homs road, following the III Corps, the 24th Division and the 3rd Cavalry Division to concentrate at Rayak with troops which left Damascus at 21:00 on the last Ottoman train out of Damascus.[13][16][17] These retreating Ottoman army units passed through the outposts established by Colonel von Oppen's Asia Corps at Rayak.[13]
Desert Mounted Corps 30 September

By midnight on 30 September, the Australian Mounted Division was at El Mezze 2 miles (3.2 km) to the west of the city with orders to block the road to Beirut and the road north to Homs, Hama and Aleppo, the 5th Cavalry Division at Kaukab was ordered to the east of Damascus, while the 4th Cavalry Division was at Zeraqiye 34 miles (55 km) south of Damascus on the Pilgrims' Road with the 11th Cavalry Brigade at Khan Deinun and Arab Sherifial forces north east of Ashrafiye.[8][18][19]
3rd Light Horse Brigade
During the night of 29/30 September, the brigade attacked and captured a strong rearguard position at Sa'sa on the road to Damascus from Kuneitra. Here two regiments advanced on the right and left flanks while a third regiment made a dismounted frontal attack to capture 20 prisoners, two 77mm field guns and two machine guns.[8][20][21]
The 3rd Light Horse Brigade subsequently bivouacked outside Damascus during the night of 30 September/1 October, having establishing picket lines to "prevent all troops except Sherifian Regulars from entering the city." With orders to cut the Homs road, the brigade entered Damascus at 05:00 on 1 October 1918.[9][22]
At the Serai, Hall of Government or Town Hall, Major A.C.N. Olden, commanding the 10th Light Horse Regiment accepted the surrender of the city from Emir Said Abd el Kader.[23][24][25]
Damascus was in a state of revolt; both the civil and military administrations had completely broken down and Olden warned that the shooting must stop.[14][24] He requested a guide to show the Australian light horsemen through the city to the Homs road.[23][24]
Battle
After taking the surrender of Damascus, the 3rd Light Horse Brigade was involved in virtually continual skirmishes throughout the day, in short but severe engagements as they moved north along the Homs road in pursuit of the retreating columns. During these attacks on Ottoman rearguards they captured many prisoners and machine guns.[26][27]
As they were leaving Damascus by the Bab Tuma, the 10th Light Horse Regiment learned that rearguards held the Nahr Ma'raba about 5 miles (8.0 km) north east of Damascus. The leading squadron supported by the regiment attacked the German machine gunners who were eventually forced to abandon their position "when [the rearguard] ... saw that the attack was about to be pressed home" by a cavalry charge.[23] The Wadi Ma'raba rearguard was captured by 09:00 along with 600 prisoners and about 40 machine guns.[28][29] The Australian light horse regiment was followed through Damascus and the Bab Tuma gate at 10:30 by the 14th Cavalry Brigade (5th Cavalry Division) which established outposts and gained touch with the 13th Cavalry Brigade (5th Cavalry Division) which had advanced round the east side of the city to the Homs road.[16][30]
.jpg.webp)
The 10th Light Horse Regiment continued their advance about 4 miles (6.4 km) north to Duma, 10 miles (16 km) from Damascus where they captured about 500 prisoners and 37 machine guns, before continuing on to Khan Kusseir 2 miles (3.2 km) further on. Here, in the evening they were opposed by a German rearguard armed with a number of machine guns.[31] The defenders were broken by a charge "delivered from the cover of some vineyards and olive groves on their right flank, and all of them were killed or captured." Street fighting with the bayonet captured Khan Kusseir, 160 prisoners and a number of machine guns.[28][29]
Another 50 prisoners were captured after a further attack before another large retreating column of between 1,500 and 2,000 Ottoman soldiers was seen 7 miles (11 km) away moving towards a pass in the hills near Khan Ayash 17 miles (27 km) north of Damascus on the Homs road. The column was protected here by a strong fortress defended by a rearguard armed with about 20 machine guns established by the Fourth Army's German 146th Regiment. Without the support of field guns several unsuccessful attacks were launched by the Australian light horsemen on the fortress. The rear of the retreating column was also attacked, inflicting some loss and capturing more prisoners and machine guns. At 19:00 the 10th Light Horse Regiment withdrew back to Khan Kusseir arriving at 22:00 to bivouac with brigade headquarters.[27][32][33][Note 2]
At 06:15 on 2 October 1918 a long column was reported retreating northwards. The 9th Light Horse Regiment trotted out at 06:45 and after several groups of machine gunners failed to delay the light horse, they rode up level with the main body of the column. Two squadrons were then ordered forward to Khan Ayash to cut the road ahead before it entered a pass, while a third squadron charged the left flank of the column, forcing it to surrender.[34] "The brigade galloped on, through a hot fire, and charged clean through the enemy force, killing a large number of them ..."[35] An advanced guard of cavalry also surrendered to the leading squadrons.[34]
.jpg.webp)
The 10th Light Horse Regiment had been ordered to advance in support, to arrive at 07:45 after the surrender of 91 officers including a divisional commander, 318 cavalry, 1,072 infantry, three guns and 26 machine guns.[33][34] They had captured over 2,000 prisoners including a divisional commander and the 146th Regimental standard, the only enemy colour taken by Australians in the First World War.[15][26][27]
Aftermath
After their last battle of the war, the 10th Light Horse Regiment occupied the pass and the hills covering the road to Homs while a squadron reconnoitred to the east until they were relieved by the 8th Light Horse Regiment (3rd Light Horse Brigade) and returned to bivouac at Khan Kusseir. The brigade returned to camp south west of Damascus on 4 October 1918.[26][27][36]
Since 19 September, Desert Mounted Corps suffered battle casualties of just 500 killed, wounded or missing.[15]
Notes
Citations
- ↑ Keogh 1955 pp. 252–3
- ↑ Falls 1930 Vol. 2 pp. 582–3
- ↑ Wavell 1968 pp. 224–5
- ↑ Bruce 2002 p. 241
- ↑ Cutlack 1941 pp. 167–8
- 1 2 Falls 1930 Vol. 2 p. 567
- ↑ Falls 1930 Vol. 2 pp. 594–5
- 1 2 3 Wavell 1968 p. 227
- 1 2 Falls 1930 Vol. 2 p. 574
- ↑ Falls 1930 Vol. 2 pp. 529–32
- ↑ Erickson 2001 pp. 200–1
- ↑ Falls 1930 Vol. 2 p. 674
- 1 2 3 Falls 1930 Vol. 2 p. 595
- 1 2 Keogh 1955 p. 253
- 1 2 3 Falls 1930 Vol. 2 p. 594
- 1 2 Preston 1921 pp. 276–7
- ↑ Bruce 2002 p. 245
- ↑ Falls 1930 Vol. 2 p. 586
- ↑ Carver 2003 p. 242
- ↑ 3rd Light Horse Brigade War Diary AWM4-10-3-44 Appendix 4 p. 5
- ↑ Falls 1930 Vol. 2 p. 570
- ↑ Hughes 1999 pp. 98–9
- 1 2 3 Falls 1930 Vol. 2 p. 589
- 1 2 3 Hill 1978 p. 178
- ↑ Jones 1987 p. 157
- 1 2 3 Wavell 1968 p. 229
- 1 2 3 4 Gullett 1941 p. 776
- 1 2 Preston 1921 p. 277
- 1 2 Baly 2003 pp. 200–1
- ↑ Falls 1930 Vol. 2 p. 591
- ↑ Falls 1930 Vol. 2 pp. 589–90
- ↑ Falls 1930 Vol. 2 pp. 589–90, 674
- 1 2 10th Light Horse Regiment War Diary 1 October 1918 AWM4-10-15-40
- 1 2 3 Falls 1930 Vol. 2 p. 590
- ↑ Preston 1921 p. 279
- ↑ 10th Light Horse Regiment War Diary October 1918 AWM4-10-15-40
References
- "10th Light Horse Regiment War Diary". First World War Diaries AWM4, 10-15-40. Canberra: Australian War Memorial. October 1918. Archived from the original on 23 October 2012. Retrieved 6 October 2012.
- "3rd Light Horse Brigade War Diary". First World War Diaries AWM4, 10-3-44. Canberra: Australian War Memorial. September 1918. Archived from the original on 21 March 2011. Retrieved 6 October 2012.
- Baly, Lindsay (2003). Horseman, Pass By: The Australian Light Horse in World War I. East Roseville, Sydney: Simon & Schuster. OCLC 223425266.
- Bruce, Anthony (2002). The Last Crusade: The Palestine Campaign in the First World War. London: John Murray. ISBN 978-0-7195-5432-2.
- Carver, Michael, Field Marshal Lord (2003). The National Army Museum Book of The Turkish Front 1914–1918: The Campaigns at Gallipoli, in Mesopotamia and in Palestine. London: Pan Macmillan. ISBN 978-0-283-07347-2.
{{cite book}}: CS1 maint: multiple names: authors list (link) - Cutlack, Frederic Morley (1941). The Australian Flying Corps in the Western and Eastern Theatres of War, 1914–1918. Official History of Australia in the War of 1914–1918. Vol. VIII (11th ed.). Canberra: Australian War Memorial. OCLC 220900299.
- Erickson, Edward J. (2001). Ordered to Die: A History of the Ottoman Army in the First World War: Foreword by General Hüseyiln Kivrikoglu. No. 201 Contributions in Military Studies. Westport Connecticut: Greenwood Press. OCLC 43481698.
- Falls, Cyril (1930). Military Operations Egypt & Palestine from June 1917 to the End of the War. Official History of the Great War Based on Official Documents by Direction of the Historical Section of the Committee of Imperial Defence. Vol. 2 Part II. A. F. Becke (maps). London: H.M. Stationery Office. OCLC 256950972.
- Henry S. Gullett; Charles Barnet; David Baker, eds. (1919). Australia in Palestine. Sydney: Angus & Robertson. OCLC 224023558.
- Gullett, Henry S. (1941). The Australian Imperial Force in Sinai and Palestine, 1914–1918. Official History of Australia in the War of 1914–1918. Vol. VII (11th ed.). Canberra: Australian War Memorial. OCLC 220900153.
- Hill, Alec Jeffrey (1978). Chauvel of the Light Horse: A Biography of General Sir Harry Chauvel, GCMG, KCB. Melbourne: Melbourne University Press. OCLC 5003626.
- Hughes, Matthew (1999). John Gooch; Brian Holden Reid (eds.). Allenby and British Strategy in the Middle East 1917-1919. Military History and Policy. Vol. 1. London: Frank Cass. OCLC 470338901.
- Jones, Ian (1987). The Australian Light Horse. Australians at War. Australia: Time-Life Books. OCLC 18459444.
- Keogh, E. G.; Joan Graham (1955). Suez to Aleppo. Melbourne: Directorate of Military Training by Wilkie & Co. OCLC 220029983.
- Preston, R. M. P. (1921). The Desert Mounted Corps: An Account of the Cavalry Operations in Palestine and Syria 1917–1918. London: Constable & Co. OCLC 3900439.
- Wavell, Field Marshal Earl (1968) [1933]. "The Palestine Campaigns". In Sheppard, Eric William (ed.). A Short History of the British Army (4th ed.). London: Constable & Co. OCLC 35621223.